
When it comes to WordPress SEO, one of the most effective tools that website owners often overlook is the use of noindex tags. This simple yet powerful feature allows you to control what pages search engines should or shouldn’t index, giving you greater control over your site’s SEO performance.
In this guide, we’ll explore the role of no index tags in WordPress SEO, why they matter, and how you can implement them on your site to improve your search engine visibility.
What Are Noindex Tags?
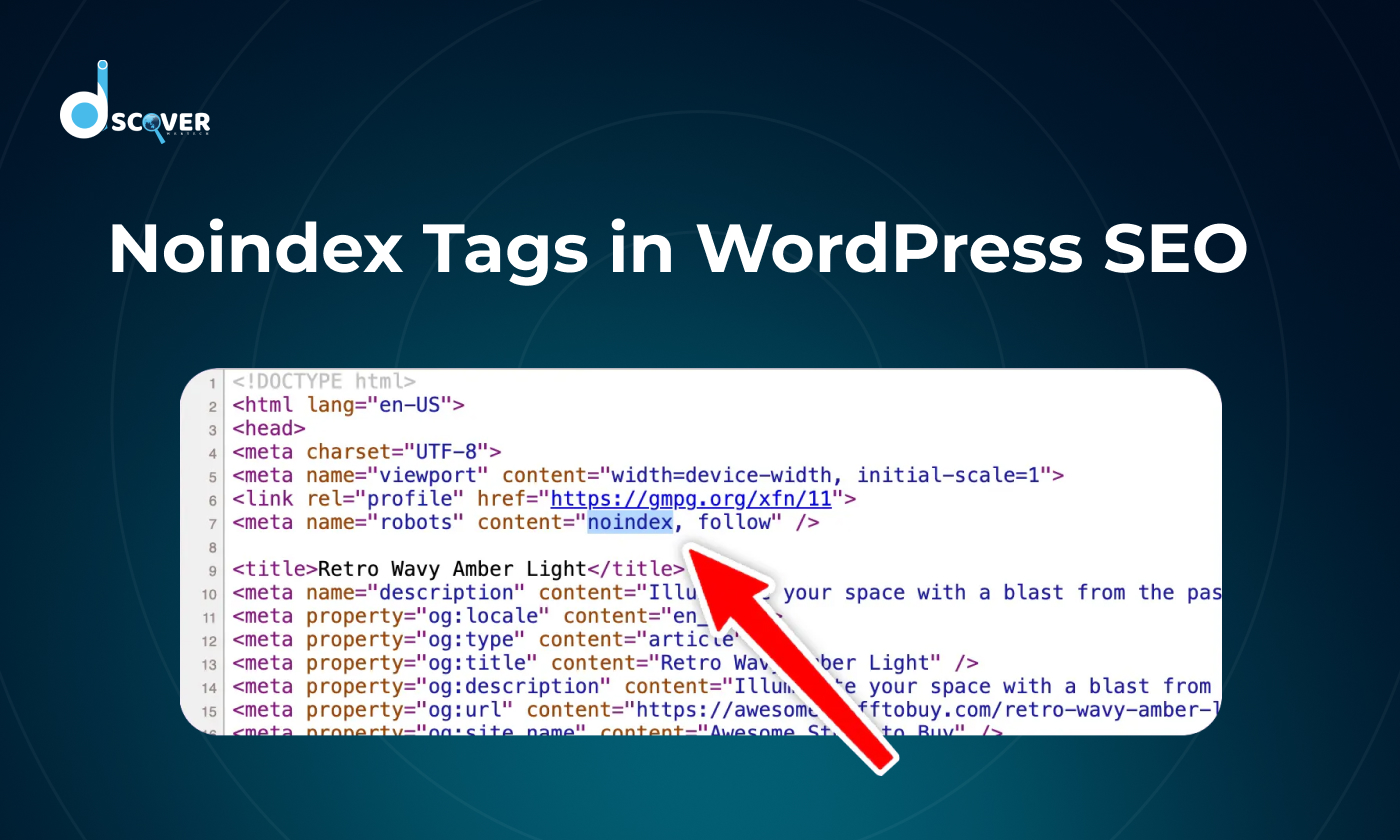
A noindex tag is an HTML tag that tells search engines not to index a specific webpage. By adding this tag to a page, you are essentially saying, “Do not include this page in search results.” This is particularly useful when you have pages with content that doesn’t contribute to your SEO efforts or may even harm your site’s ranking.
For example, if you have duplicate content, admin pages, or thank you pages, you might want to prevent search engines from indexing these to avoid potential SEO penalties.
Why Noindex Tags Matter for WordPress SEO
Noindex tags help WordPress site owners control what gets indexed, improve SEO performance, and protect important rankings. Here are some common issues.
1. Preventing Duplicate Content Issues
One of the most common problems in SEO is duplicate content. If search engines detect multiple pages with similar content, they may struggle to determine which one should rank. This can lead to a drop in rankings across all pages. By using noindex tags, you can ensure that duplicate pages are not indexed, preventing any negative impact on your rankings. If you’re unsure about which pages to apply noindex to, considering a consultation with an online marketing expert can provide valuable guidance tailored to your website’s needs.
2. Protecting Low-Value Pages
Some pages on your WordPress site may not have much value for search engines. These could include:
- Archive pages
- Tag or category pages
- Search results pages
- Login or admin pages
Adding noindex tags to these pages ensures that search engines don’t waste crawl budget on irrelevant content.
3. Improving Crawl Budget Management
Search engines have a limited crawl budget, which is the number of pages they can crawl on your site during a given time. By placing noindex tags on pages that aren’t crucial for SEO, you ensure that search engines focus on the pages that matter most. This allows you to make the best use of your crawl budget and ensure that your important pages get indexed.
4. Optimizing for User Experience
Sometimes, certain pages like “Thank You” pages, checkout pages, or privacy policies are necessary for user experience but don’t offer much SEO value. By using noindex tags, you can clean up your site’s search engine results and prevent unnecessary pages from cluttering up search queries.
How to Add Noindex Tags in WordPress
Now that you understand the importance of noindex tags, let’s walk through how to implement them on your WordPress site.
Method 1: Using the Yoast SEO Plugin
If you’re using the Yoast SEO plugin, adding noindex tags is very simple. Here’s how:
- Install and Activate Yoast SEO: First, make sure you have the Yoast SEO plugin installed and activated on your WordPress site.
- Edit the Page/Post: Go to the post or page you want to add the noindex tag to.
- Scroll to Yoast SEO Meta Box: Scroll down to the Yoast SEO meta box below your post editor.
- Advanced Settings: Click on the “Advanced” tab (gear icon).
- Select Noindex: Under the “Allow search engines to show this Post in search results?” option, select “No”.
- Save Changes: Update or publish your page to implement the noindex tag.
Method 2: Using the RankMath Plugin
For RankMath users, the process is just as straightforward:
- Install and Activate RankMath: Make sure you have the RankMath plugin installed and activated.
- Edit Page/Post: Go to the page or post you want to modify.
- Scroll to RankMath Settings: Scroll to the RankMath meta box below the content editor.
- Advanced Settings: Under the “Advanced” tab, you will find the “Robots Meta” option.
- Select Noindex: Choose “Noindex” from the drop-down menu.
- Save Changes: Update the page or post.
Method 3: Manually Adding Noindex Tags in the Header
If you’re not using a plugin and prefer doing things manually, you can add the noindex tag directly in the HTML of your page.
- Go to the page or post you want to modify.
- Access the HTML editor: In the WordPress block editor, click on the three dots in the top-right corner and select “Code Editor.”
- Add the Noindex Tag: Within the <head> section, add the following code:
<meta name=”robots” content=”noindex, nofollow”> - Update the Page: Save your changes.
Best Practices for Using Noindex Tags in WordPress
Using noindex tags wisely can significantly boost your site’s SEO performance. Here are some best practices to help you apply them effectively and avoid common mistakes.
1. Don’t Overuse Noindex Tags
While noindex tags are powerful, they should be used carefully. You don’t want to accidentally prevent important pages from being indexed. Be selective about the pages you apply the noindex tag to.
2. Monitor Your Indexing Status
Using tools like Google Search Console can help you track which pages are being indexed and which ones aren’t. Keep an eye on your site’s performance and make adjustments to your noindex tags as needed.
3. Use Noindex for Low-Value Pages
Focus on adding noindex tags to pages that offer little to no value for SEO. These include:
- Internal search result pages
- Tag and category archive pages
- Duplicate content pages
4. Don’t Block Important Pages
Make sure that your essential pages like product pages, service pages, or blog posts are indexed. Blocking important pages with noindex tags can significantly hurt your site’s SEO performance.
Common Mistakes to Avoid with Noindex Tags
While noindex tags are powerful for SEO, using them incorrectly can hurt your site. Let’s look at some common mistakes you should avoid to stay on track.
1. Accidentally Blocking Important Pages
One of the biggest mistakes WordPress users make is accidentally adding the noindex tag to important pages like homepage, service pages, or blog posts. Double-check before saving your changes.
2. Not Updating When Necessary
If you decide to un-noindex a page later, remember to remove the noindex tag so the page can be re-indexed by search engines.
3. Using Noindex on Pages You Want to Rank
Sometimes website owners mistakenly add noindex tags to pages they want to rank. Always ensure that your key pages are indexed by search engines.
Final Thoughts
The use of noindex tags in WordPress is an essential aspect of managing your site’s SEO. By strategically adding these tags, you can ensure that search engines focus on the right pages and avoid indexing content that may negatively affect your rankings. Whether you’re preventing duplicate content, improving crawl budget efficiency, or protecting low-value pages, they can help optimize your site’s performance.
By following the best practices outlined in this guide, you’ll be able to effectively use noindex tags in WordPress, giving you greater control over your site’s SEO and ensuring better visibility in search results.
Contact us to know more about our SEO Service
Check out our latest blog on: “How to Find Competitor Keywords Using SEMrush, Ahrefs, and Ubersuggest”